DIY Underwater Video Camera
 This underwater camera is made by housing a small security camera inside a pressure tight container. This setup will work perfectly in clear water, but with increased water turbidity, lights will be necessary to improve performance. Construction details for the lights and housing are shown below.
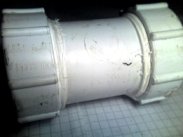
This plumbing accessory form a local DIY store forms the main part of the housing. It was chosen for its compact size, and it allows both ends to be easily removed so the components remain accessible.
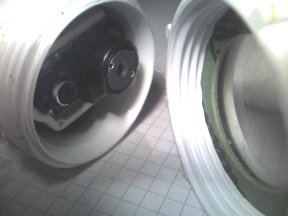
 The two end caps are not fully closed. This allows a small perspex window to be added for the camera to see through. A perspex disc should be cut to fit neatly inside the cap with an o-ring either side. PTFE tape wrapped around the screw thread will ensure a tight fit when screwing on the caps.
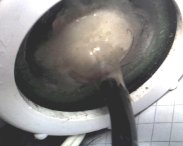
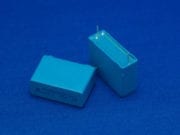
The cable is sealed in the middle of another perspex disc. This allows the ends to be unscrewed without twisting the cable. Layers of Polymorph and epoxy resin are built up either side of the disc, and around the cable to form a strong flexible seal.
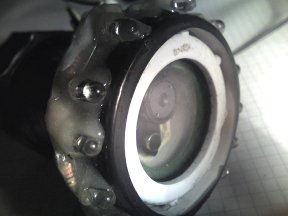
 The light source is an array of bright LED’s. The LED’s shown here are from surplus parts and are not the most effective light source for a camera. The best LEDs would be either white or infra red, as the camera will respond best to these. The LEDs and resistors were mounted on a plastic strip which is formed into a ring to fit over the end of the camera housing. They are sealed using Polymorph and epoxy resin.
The lights shown here are a combination of blue, ultra violet, white, and infra red LEDs. There are fifteen in total. It looks pretty cool, but a white or IR light would be better. The power for the LED’s was taken from the same 12V battery used for the camera so it was neccesary to reduce this power to a lower level for them. To do this a power pulse modulator was used with the frequency set high and the pulse width set very low. This served as a dimming module for the LEDs so the brightness could be finely contolled.
Check out he video captured with this camera in the Alsager Mere section.


Four core screened cable
where can the cable be purchased, and what is it called?
The camera is powered from 12V DC which is passed down a multi core cable with the signal wires.
The lights are connected to the same power source, but using an independant cable capable of carrying larger currents.
How is this device powered?